5 Steps to Optimizing Your Images for the Web
Even though image optimization is a little more behind the scenes on what it can do for your website, it’s definitely important enough that you’ll want to learn at least the basics. Image optimization helps to improve page load speed and as a result, will boost your website’s SEO ranking. It also has the added benefit of improving a user’s experience. And, if you add alt tags, you’ll improve your website’s accessibility as well. That’s why image optimization is a skill you’ll want to learn.
What is image optimization?
Image optimization is the process of producing high-quality images in the right dimension, format, and resolution while keeping the file size as small as possible. The reason why you’ll want to do this is because it helps improve your website’s speed, and by taking the steps to properly optimize your images, you’ll rank better on Google and other search engines.
There are three main questions most people have when they first start learning about image optimization.
Why don’t my product images show up in search results?
Is it necessary to add alt attributes to my images?
What’s the difference between a JPG, PNG, and GIF? And when should I use one over the other?
The answer? A little clean-up and production work, and you’ll be well on your way to an improved version of your website. Here are five steps you can take to optimize images for your website:
Use descriptive image names
Adding alt attributes
Choose your product images
Reduce the file size of your images
Choose the right image file format
Use descriptive image names
When you’re going through tons of photos of your product, it’s typical to keep the default file names set by your camera. But when it comes to image SEO, it’s pretty important that you include the relevant keywords in the image name. That way, when search engines scan for text on your website, they’ll also your image file names. That’s why creating a keyword-rich and descriptive image file name is an important part of your overall webpage SEO.
How to optimize your image file name
To understand how to name an image file properly, let’s take this picture as an example.
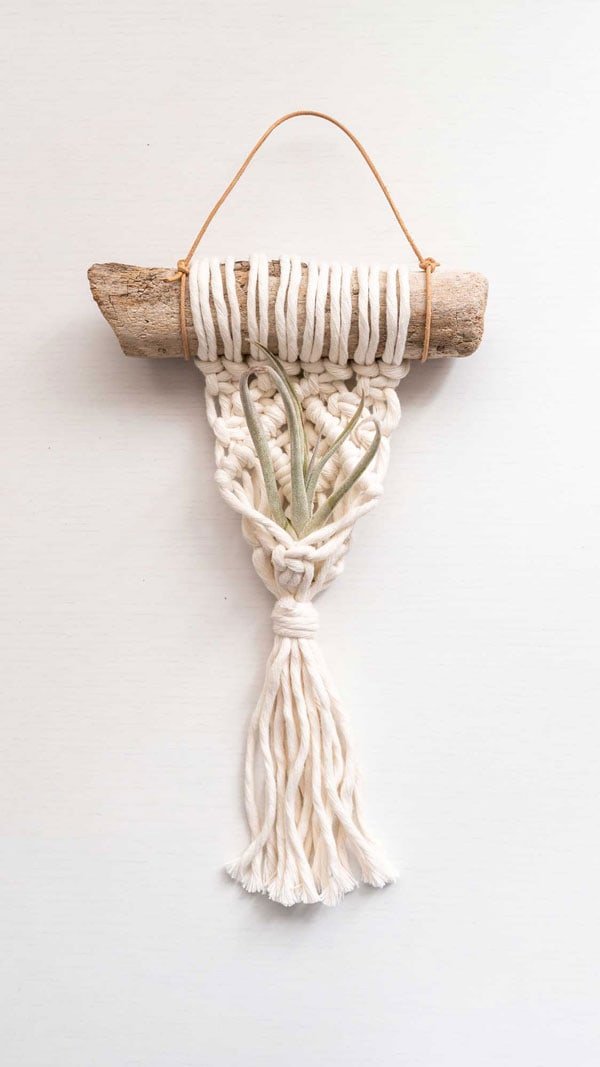
Let’s say you’ve captured this picture of your product with your camera. Your camera will assign it a name consisting of a bunch of letters and numbers by default, such as “0V5A1629.jpg”. If you upload it on your website keeping the name as is, search engines won’t be able to understand the image they’re scanning. Since the they don’t understand the images they’re scanning, they won’t index them to appear in search results. You see, when people search for an image, they typically don’t search for “0V5A1629”. I mean, who does that? That’s why a file name like “macrame-plant-hanger.jpg” is way better to use for this example.
Do a little keyword research
A good way to figure out which keyword to use it to do a little research and find out which words customers type in the search box when searching a similar product to yours. I like using Neil Patel’s Ubersuggest because it’s free and easy to use. Try thinking like your consumer. What search terms would they use? Then broaden or narrow your terms to find something that’s right for you. For example, “macrame plant hanger” has a search volume of 27,100. If I narrow that down to “modern macrame plant hanger”, the competition to rank goes down from 52 to 36 making it easier to appear at the top of a Google search, but the search volume goes way down to 110 which gets to be really low. So I’ll stick with naming the file “macrame-plant-hanger.jpg” to keep it relevant, descriptive and keyword-rich.
Adding alt attributes
Alt attributes are the text alternatives to images so that screen readers know how to describe the pictures on your website to the visually impaired. Accessibility is a great best practice. Anytime you can make your website more user friendly, you’re on the right track. By adding descriptions to your images, now your making your images accessible to the visually impaired. And because alt tags create a better user experience, it in turn improves your website’s SEO as well.
How to write alt attributes for your images
Let’s take a look at an example. For the macrame product we are featuring, the alt tag might be something like this, “Handmade Macrame Air Plant Hanger in Natural”. So when a person who uses a screen reader gets to this image, the screen reader will read out that description, and the user will have a better understanding of the contents of the photo, even is they’re having trouble seeing it.
Whenever you upload a new product image on your website, you should fill out its alt attribute. When you do, keep in mind the following:
Just like your image file names, use plain language to describe your images in the alt attribute. Avoid using jargon.
Make sure to include the model numbers or serial numbers of your products. This is also helpful in case someone wants to place an order using that number.
Don’t stuff your alt attributes with keywords. Try and be as natural as you can about your writing.
Avoid using alt attributes for decorative images such as a supporting image that’s merely visual eye candy as it may bring a penalty to your website.
Choose your product images
If you are trying to sell a product, you’ll want to showcase its important features. Take various types of photos of your product, such as studio shots, shots to show scale, and close-ups to name a few. In fact, check out Etsy’s awesome write-up about product photography in their Seller Handbook. It outlines all the types of photos that will help a customer make an informed purchase.
Let’s go back to the macrame example. If you’re trying to sell a little macrame plant holder, you’d want to take various shots of it showing it from different angles

Example alternate product image view at an angle.
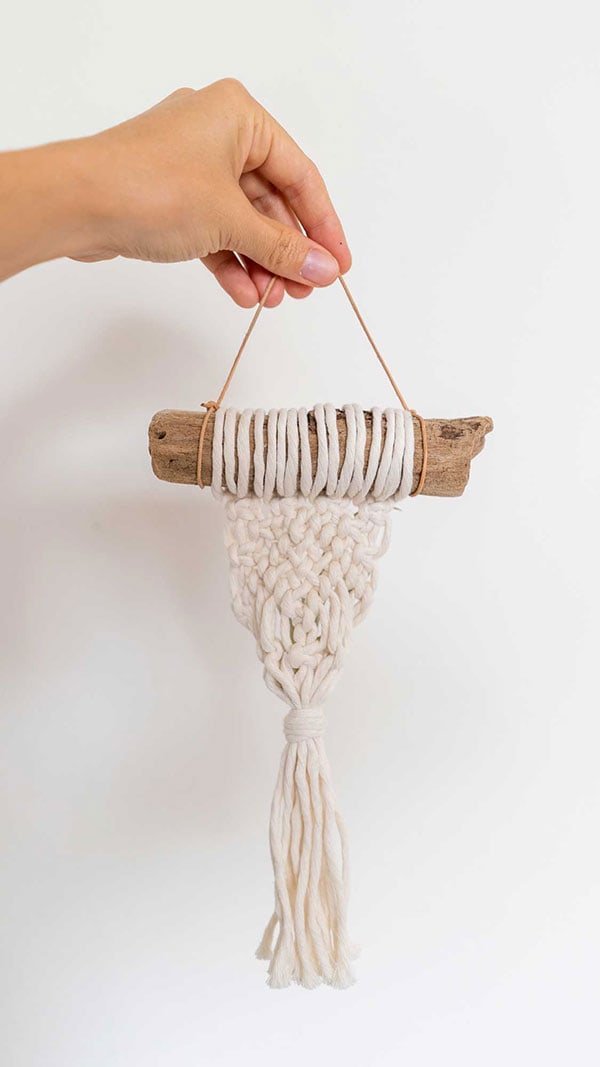
Example alternate product image view from the back.
In order to get the most out of these extra pictures, you’d want to create unique alt attributes for each picture. Here are some examples:
“tadmint-macrame-plant-hanger-angle.jpg” might use an alt attribute such as “Macrame Plant Hanger 3/4 Angle View”
“tadmint-macrame-plant-hanger-back.jpg” could use the alt tag “Macrame Plant Hanger Back View”
Reduce the file size of your images
To understand why it is important to keep the file size of your images down, check-out these fun facts:
Almost 50% of consumers prefer to wait less than 3 seconds for an e-commerce site to load. 3 seconds!
Amazon found that if their pages were to slow down by just one second, they would lose $1.6 billion a year.
Google has designed its algorithm to put e-commerce sites with fast load time at the top of the search results.
So, clearly it’s important that your webpages load quickly. And as we’ve learned, one key way to do this is by not bogging down your pages with large images. Otherwise, you’ll likely lose potential customers.
Optimizing images with Adobe Photoshop
Before you start compressing your image, you’ll want to take a look at your specs. For anything that is used in the body of your website and doesn’t need to span the full width, I try to keep the image at around 600px wide.
Once you have your specs squared away, you’re ready to export your file. If you have Adobe Photoshop installed, you can use the Save for Web function to export your file. Go to File > Export > Save for Web (Legacy)…, or Shift + Alt + Command + S on a Mac to reduce the file size. When using this command, try reducing the image file size as much as possible while maintaining image quality. Usually, I use the “high” setting because it reduces the file size enough, but still keeps the integrity of the photo. This is ideal for suggorting images that live within the body of the page.
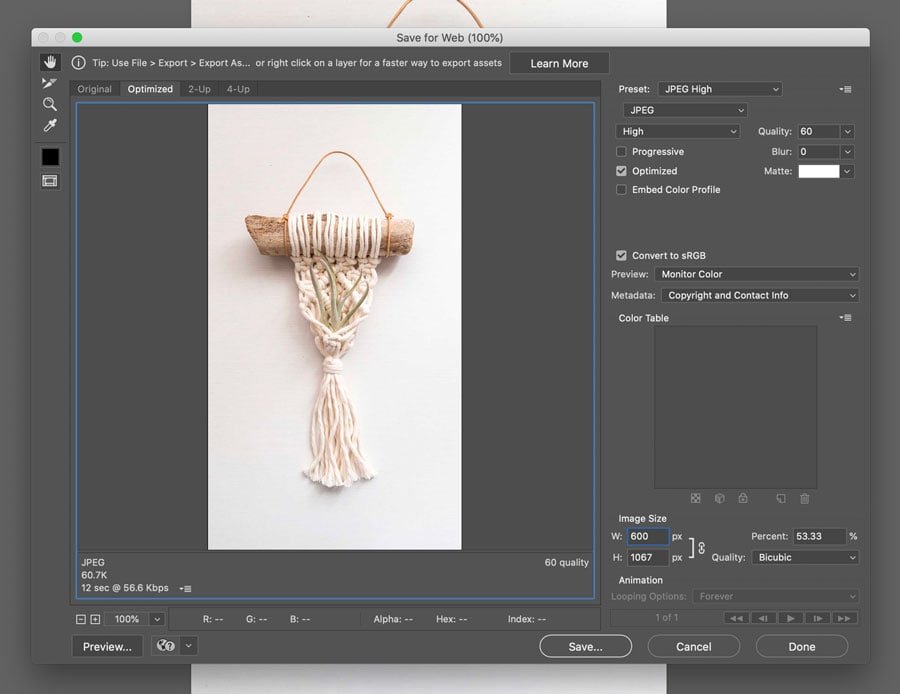
In this screenshot, the Save for Web settings are JPEG High with a quality of 60.
For larger images that might be around 1500px wide, such as a photo or graphic for a header banner, I use “medium” because a “high” setting usually isn’t enough of a compression. It’s not an exact science, so definitely play with it. And you’ll notice that the more information you have in your images, such as number of colors, the larger the file size. So if you can keep the content of your images to a minimum, your file sizes will naturally be smaller to begin with.
Using ImageOptim to further compress your image
Once I compress the file in Photoshop, I run it once more through a separate program called ImageOptim. You can download this application for free. Once you have the program open, simply drag and drop your file into the ImageOptim window, and it’ll compress the image automatically. For JPGs, I normally compress it down to about 87% of it’s original file size. One thing to note about ImageOptim is that it will save over the file you drop in, so you might want to create a copy of your image before compressing it. If you’d like to change the compression settings from it’s default, click on the gear icon in the bottom right hand corner.

Consider these ImagOptim settings with a JPEG quality of 87%, a PNG quality of 80%, and a GIF quality of 80%.
Optimizing images with Photopea
If you don’t have Photoshop installed, there are tons of image editing tools you can use online to edit your image. The one I personally have used is Photopea. The reason why I like this application is because it has other advanced functions, such as the ability to convert Sketch files to Photoshop files, and it resembles Photoshop’s user interface quite a bit.
As one last quick tip for compressing your images, remember that all of these guidelines for image optimization apply to your thumbnail images too. If your website platform allows you to create thumbnail images for your product, you’ll want to resize those as well so that you have the lightest website possible that loads quickly and gives the user the best online experience. With that said:
Choose the smallest image file size possible to use as a thumbnail.
Create unique alt attribute texts for thumbnails.
Optimizing images with Website Planet
This tool was suggested by a reader — thank you Lindsey! This optimizer will compress both JPGs and PNG files up to 50MB. Check it out here.
Choose the right image file format
JPG, GIF, and PNG are the three most used image file formats for the web. Here are my rules of thumb for choosing which file format to use:
Unless you have to have a transparent background, JPG is the go-to file format. JPGs can be compressed considerably without compromising the quality too much. This results in a quality image with a smaller file size.
Use PNGs for images that require a transparent background. The downside of PNGs is that the file size tends to be larger. They look so much nicer than GIFs though, so if you can afford the file size, I would go with that.
GIFs can be used if you are animating an image (animated GIFs). Unfortunately, GIFs don’t support as many colors as JPGs and the quality of the image reduces drastically the more you compress it. I normally stay away from these for the most part.
Overall, JPGs are the best file format to use on websites because it produces the best quality image and smallest file size.
Wrapping Up
Alright, that’s it for now! Hopefully, this guide will help you understand both the importance of image optimization as well as give you an overview on how to achieve it. Let me know if you have any questions! Post those below. And thank you for your time!
Reference articles:
10 Must Know Image Optimization Tips